

In this post of the PyTorch Introduction, we’ll learn how to use custom datasets with PyTorch, particularly tabular, vision and text data
PyTorch is one of the hottest libraries in the Deep Learning field right now. Since ChatGPT’s release, deep learning libraries have arguably garnered the most attention among data scientists and machine learning engineers, particularly due to the current practical applications they enable.
With their extensive capability of performing complex multidimensional calculations extremely fast, these libraries changed the way we train Neural Network models. Particularly, they are extremely helpful in managing the large number of weights that these models store and optimize. Rivaling with TensorFlow (Google’s framework), PyTorch is Meta’s open-source framework, giving you the ability to train deep learning models with a very cool and practical syntax.
So far, in this PyTorch series, we’ve learned a couple of fundamentals that gave us the ability to work with this library. For example:
- Learning the basics about tensors;
- Understand how to create our first Linear Model (regression) using PyTorch.
- Learn how to work with non-linear activation functions and how to solve non-linear problems.
We’ve used few custom datasets in our examples and previous blog posts. As we progress towards training our deep learning models in this series, it’s very helpful to understand how we can integrate different datasets in the context of PyTorch. In this blog post, we’ll learn how to work with custom datasets in the library, particularly integrating three different types of data:
- CSV Files
- Image Data
- Text Data
Also, we’ll get in contact with the concept of Data Batches and how to use PyTorch custom DataLoader for that effect. Some of the inspiration for this blog post comes from Zero to Mastery Pytorch Free Course — feel free to check out this awesome resource with a lot of interesting learning examples.
Let’s start!
Creating a Random Dataset
First, let’s start by creating a random dataset in Pytorch, to understand how we can work with DataLoader :
import torch
from torch.utils.data import Dataset, DataLoader

class RandomIntDataset(Dataset):
    def __init__(self, start, stop, x, y):
        self.data = torch.randint(start, stop, (x,y))
        self.labels = torch.randint(0, 10, (x,))

    def __len__(self):
        return len(self.labels)

    def __str__(self):
        return str(torch.cat((self.data, self.labels.unsqueeze(1)), 1))

    def __getitem__(self, i):
        return self.data[i], self.labels[i]
Our RandomIntDataset creates a random torch object, with random labels. Notice how we introduce some dunder methods in the class and inherit from torch.utils.data.Dataset (this will be especially helpful, particularly when we combine our dataset with DataLoader ).
Based on the previous class, let’s create our first dataset object!
dataset = RandomIntDataset(100, 1000, 500, 10)Again, as we are inheriting from a Pytorch base class, we can use DataLoader to create a nice iterable:
dataset_loader = DataLoader(dataset, batch_size=10, shuffle=True)It’s super common to pass data using batches inside Neural Networks and the DataLoader constructor takes care of that by having a neat batch_size argument that we can use! As dataset_loader is an iterable, we can use next and iter to get sequential batches of our data:
data, labels = next(iter(dataset_loader))
data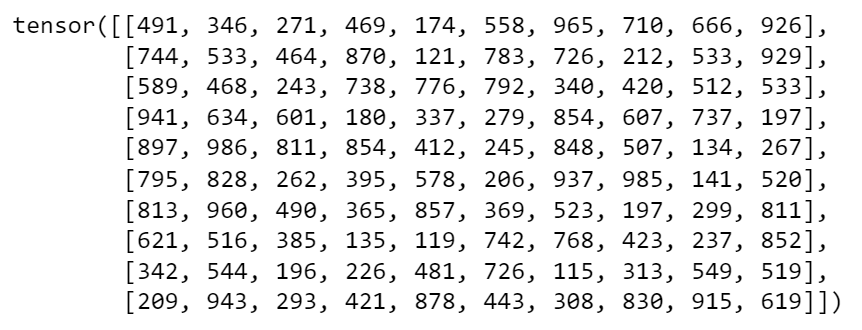
Run a new iteration of next(iter(dataset_loader) to see how the data moves to a next batch! This will show you different data inside the data and labels objects.
Of course, this random dataset can’t really be considered a “custom dataset”. It’s very unlikely that we’ll want to work with random generated data. But, this intro was helpful to get familiar with batching and we are ready proceed and include our first csv into our pytorch pipeline!
Combining DataLoader with Custom Datasets
As we’ve seen, using random datasets is a trivial exercise. But now that we know how DataLoader and data batches work, we can use that knowledge to create a new class with a custom pytorch dataset:
import pandas as pd

class TaxiSample(Dataset):
    def __init__(self):
        super().__init__()
        df = pd.read_csv('data/taxi_data_sample.csv')

        features = ['passenger_count',
                    'pickup_longitude',
                    'pickup_latitude',
                    'dropoff_longitude',
                    'dropoff_latitude']

        target = 'trip_duration'

        self.features = torch.tensor(df[features].values,
                                     dtype=torch.float32)

        self.labels = torch.tensor(df[target].values,
                                     dtype=torch.float32)

    def __len__(self):
        return len(self.labels)

    def __getitem__(self, idx):
        return self.features[idx], self.labels[idx]
Note: I’m importing the libraries as the post goes by but all libraries should be imported in the start of your scripts!
The dataset we are using is a sampled version of the Taxi Trip Duration competition on Kaggle. Here, we choose to pass our csv in the init (we can also pass this as an argument to make this function more tweakable). Let’s see how this fits nicely with DataLoader:
data_taxi = TaxiSample()
dataset_loader = DataLoader(data_taxi, batch_size=20, shuffle=True)
With our batch size of 20, we can create an iterator on this dataset:
data_iterator = iter(dataset_loader)
data, labels = next(data_iterator)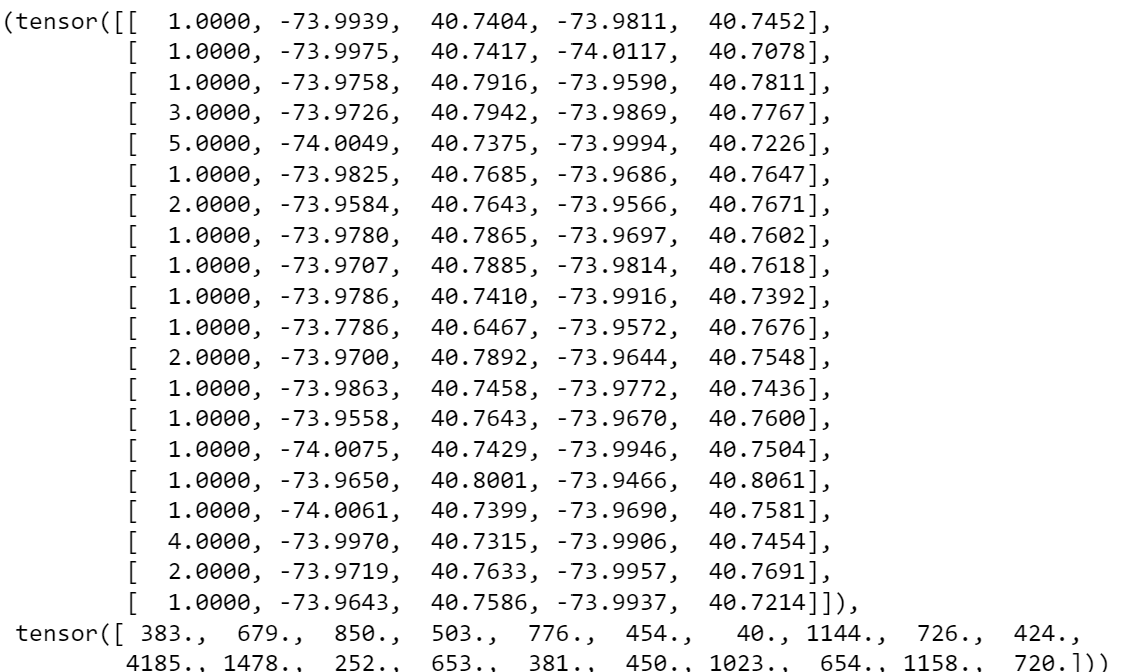
Cool! These are the first 20 random examples from the dataset. In the image above we can see the features plus the corresponding label.
The cool thing is that we can now use our class to extend several features for example:
- Add standardization to the
TaxiSample - Perform train and test split
Can you add these transformations to the class by yourself? Using this abstraction enables us to fit an external csv with pytorch batches quite easily!
Using Image Data
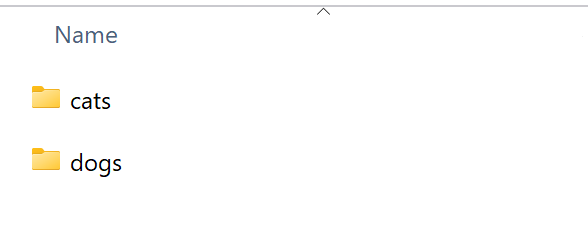
In this section of the blog post, we’ll use Microsoft Research Cats. vs Dogs. dataset to showcase Pytorch‘s ability to deal with image data. Let’s start by defining our path using pathlib :
from pathlib import Path
data_path = Path(“data/dogs_cats”)
Inside the folder, I have two folders, one with image of dogs, and the other with image of cats. Let’s extract the image paths from each folder:
For this section, we’ll need torchvision , a cool extension on pytorch, with common computer vision transformations and architectures:
from torchvision import datasets, transformsLet’s read the jpg filenames next:
image_dogs_list = list((data_path/’dogs’).glob(“*.jpg”))
image_cats_list = list((data_path/’cats’).glob(“*.jpg”))
.. and combining our lists into a single object:
image_paths = image_cats_list + image_dogs_listLet’s see if everything is working fine by extracting a random image from our list:
import random
from PIL import Image

random.seed(20)

random_image_path = random.choice(image_paths)
image_class = random_image_path.parent.stem

img = Image.open(random_image_path)

print(f"Random image path: {random_image_path}")
print(f"Image class: {image_class}")
print(f"Image height: {img.height}")
print(f"Image width: {img.width}")
img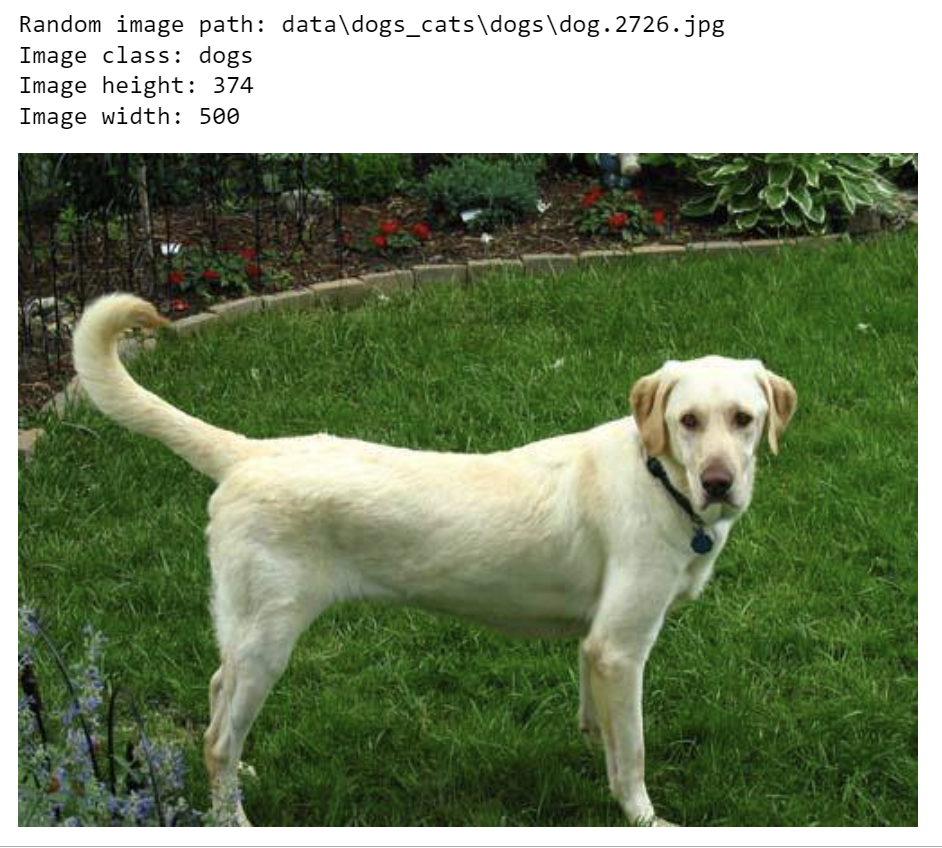
Cute little doggo!
One common step to perform when transforming images into tensors is to resize images to common formats — we can use the transforms library to help us with that and build our first vision pipeline!
data_transform = transforms.Compose([
 # Resize the image
 transforms.Resize(size=(64, 64)),
 # Flip the images randomly on the horizontal — this is a step for data augmentation
 transforms.RandomHorizontalFlip(p=0.5),
 transforms.ToTensor()])
In this transforms pipeline we are doing the following:
- Resizing the image into a 64x64 pixel size one.
- Add a that performs a random horizontal flip — this is commonly used as a step for data augmentation.
- Transforms the image into tensor.
Plotting one of our images and it’s transformed version side by side:
import matplotlib.pyplot as plt

def plot_transformed_images(image_paths: list,
                            transform: transforms.Compose,
                            n=3,
                            seed=100):
    random.seed(seed)
    random_image_paths = random.sample(image_paths, k=n)
    for image_path in random_image_paths:
        with Image.open(image_path) as f:
            fig, ax = plt.subplots(1, 2)
            ax[0].imshow(f)
            ax[0].set_title(f"Original Image \nSize: {f.size}")
            ax[0].axis("off")
            transformed_image = transform(f).permute(1, 2, 0)
            ax[1].imshow(transformed_image)
            ax[1].set_title(f"Transformed Image \nSize: {transformed_image.shape}")
            ax[1].axis("off")
            fig.suptitle(f"Class: {image_path.parent.stem}", fontsize=16)
plot_transformed_images(image_paths,
transform=data_transform,
n=1)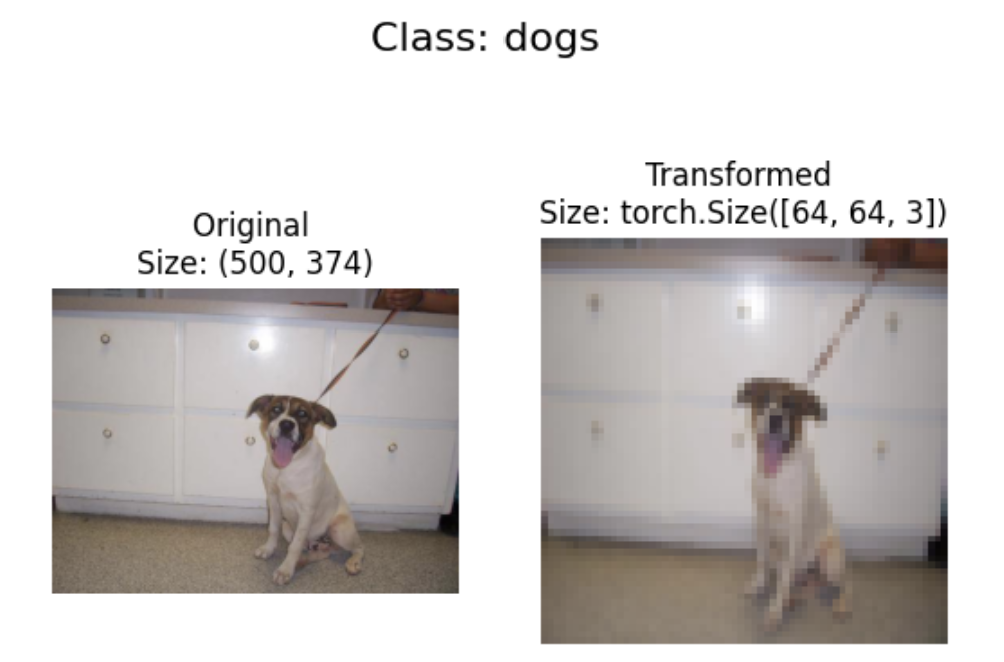
Cool! Let’s just see how we can access underlying tensors with transform — for example, for the first image:
image_path = image_paths[0]
data_transform(Image.open(image_path))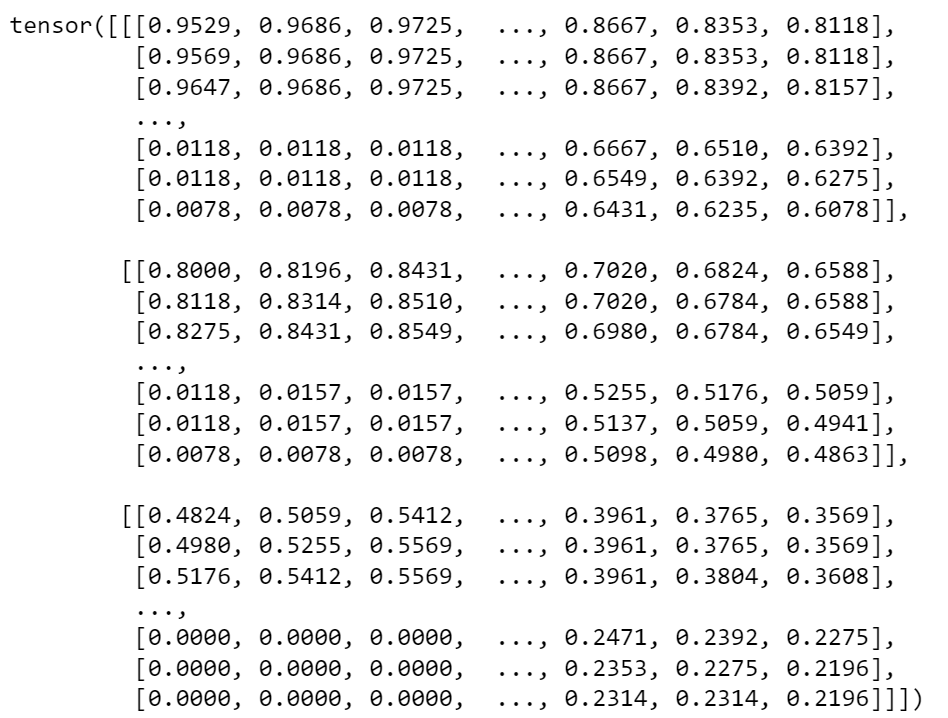
The data_transform generated a 3 channel (RGB) 64x64 tensor!
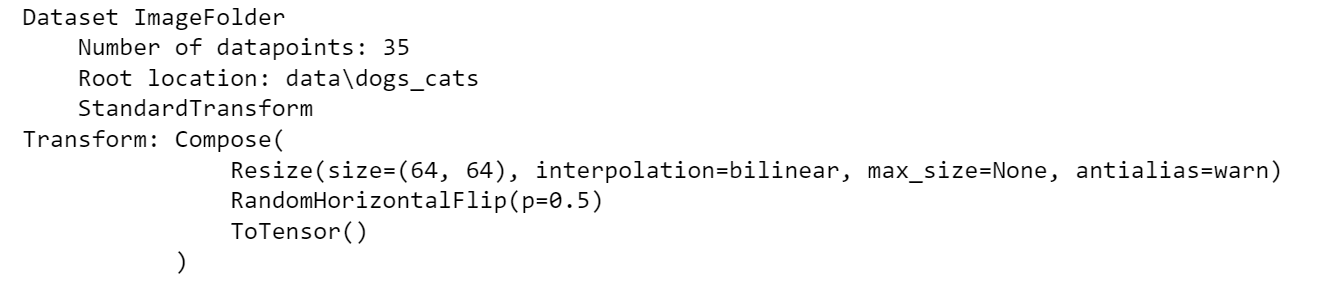
One final thing before we move on — there’s an alternative to create tensors and labels faster. We can use the handy ImageFolder to create our training data:
train_data = datasets.ImageFolder(root=data_path,
 transform=data_transform,
 target_transform=None)
With datasets.ImageFolder
class_names = train_data.classes
class_names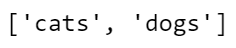
The output of class_names contains the current tags (read from the folder names) for our computer vision model. train_data now contains some important metadata about our computer vision process:
And now turning dataset ImageFolders into DataLoaders is quite straightforward:
train_dataloader = DataLoader(dataset=train_data,
 batch_size=5,
 num_workers=1,
 shuffle=True)

train_dataloader
Voilá! We have an iterable:
img, label = next(iter(train_dataloader))
print(f"Image shape: {img.shape} -> [batch_size, color_channels, height, width]")
print(f"Label shape: {label.shape}")
Cool! In this batch size of 5, we can obtain the 3x64x64 tensors, representing images of 64 by 64 pixels of 3 channels (RGB).
Now we can use these data batches to train a machine learning model that recognizes images of dogs and cats! (this is actually something we will do in the next blog post of this series!)
Using Text Data
In this last bit of the post we’ll use the fetch_20newsgroups from sklearn.datasets , particularly to create string-to-integer mapping:
from sklearn.datasets import fetch_20newsgroupsLet’s load the following from newsgroups:
from sklearn.datasets import fetch_20newsgroups

categories = [
 ‘comp.os.ms-windows.misc’,
 ‘rec.sport.baseball’,
 ‘rec.sport.hockey’,
]

dataset = fetch_20newsgroups(subset='train', categories=categories, shuffle=True, remove=('headers', 'footers', 'quotes'))
corpus = [item for item in dataset['data']]
This next function will pre-process the text:
import nltk
import re

def preprocess_text(text: str) -> str:
    '''
    Pre processes text from the input data by removing
    special characters and number.

    Returns a list of tokens
    '''
    # remove special chars and numbers
    text = re.sub("[^A-Za-z]+", " ", text)
    tokens = nltk.word_tokenize(text.lower())
    return tokens
Building a function that creates our vocab, next:
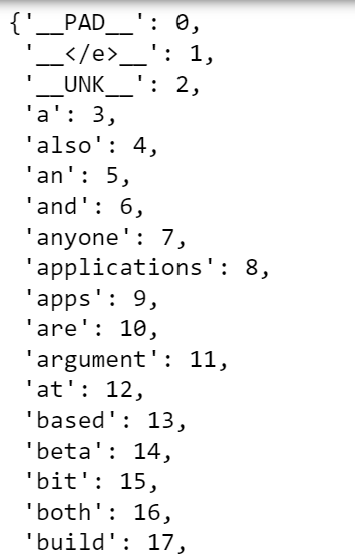
def get_vocab(training_corpus):
  # add special characters
  # padding, end of line, unknown term
  vocab = {'__PAD__': 0, '__</e>__': 1, '__UNK__': 2}
  for item in training_corpus:
   processed_text = preprocess_text(item)
   processed_text.sort()
   for word in processed_text:
   if word not in vocab:
   vocab[word] = len(vocab)
   return vocab
What’s the size of our full vocab ?
vocab = get_vocab(corpus)
len(vocab)
Our vocab contains a bit over 26 thousand words and each word is mapped to an integer:
With this in place, we can use a function to convert our text into tensor using the string-to-integer method:
def text_to_tensor(text: str, vocab_dict: dict) -> torch.tensor:
    '''
    Pre processes text and creates integer mapping in tensor format.
    '''
    word_l = preprocess_text(text)

    # initialize empty tensor
    tensor_l = []

    # take the __UNK__ value from the vocabulary
    unk_ID = vocab_dict['__UNK__']

    # for each word in the lsit:
    for word in word_l:
        # take the index
        # if the word is not in vocab_dict, then assign UNK
        word_ID = vocab_dict.get(word, unk_ID)
        # append to tensor list
        tensor_l.append(word_ID)

    return torch.tensor(tensor_l)
An example of how this function converts our text to tensor is highlighted below for the first 200 words of the first piece of text:
snippet = corpus[0][0:200]
print('The text: "{}" is represented by {}'.format(snippet, text_to_tensor(snippet, vocab)))
Take note that we are only using string-to-integer to create the tensor. We are not applying any type of word vector approach that encapsulates meaning. This is something reserved ford word vectors (such as BERT, Word2Vec or other) where there is a mathematical logic and idea behind the tensor. In this case, the tensor is only a numeric mapping between the order of the word in the vocab and its respective placement in the text. Nevertheless, this is a good alternative on normal one-hot vectors used in text processing.
Thank you for taking the time to read this post! Using custom data within Pytorch enables us to train our own deep learning models.
In this post, we’ve checked several important topics on how to generate our own tensor data based on custom datasets:
- Learning how to work with the
Datasetconstructor. - Understand how to work with
DataLoaderfor batching data. - Load a csv within the
Datasetconstructor. - Create our own image data pipeline with
transforms.Compose - Finally, we’ve seen an implementation of string-to-int transforming raw text to tensors.
If you would like to learn more posts on this PyTorch series, check the following links:
Resources for this post:
- Taxi Trip Duration — https://www.nyc.gov/site/tlc/about/tlc-trip-record-data.page
- Cats and Dogs images citation:
@Inproceedings (Conference){asirra-a-captcha-that-exploits-interest-aligned-manual-image-categorization,author = {Elson, Jeremy and Douceur, John (JD) and Howell, Jon and Saul, Jared},title = {Asirra: A CAPTCHA that Exploits Interest-Aligned Manual Image Categorization},booktitle = {Proceedings of 14th ACM Conference on Computer and Communications Security (CCS)},year = {2007},month = {October},publisher = {Association for Computing Machinery, Inc.},url = {https://www.microsoft.com/en-us/research/publication/asirra-a-captcha-that-exploits-interest-aligned-manual-image-categorization/},edition = {Proceedings of 14th ACM Conference on Computer and Communications Security (CCS)},}